Webhooks App
Overview
You can use the ScreenCloud webhook app to develop custom inputs that can be pushed to Studio and utilise our core onscreen design language, ensuring your content looks great on screen. This guide will help get you setup.
Setting Up the App Instance
Begin by installing the Webhooks app from the Studio App store. Create a new instance, after which you'll then name your webhook and click the Generate webhook button. This will return a unique webhook URL and an API key, both essential for sending webhook requests.
Here's what your unique webhook URL will look like:
https://apps-api-feeds.{region}.screencloudapps.com/v1/hooks/{uniqueId}
Your API key will be a 24-character alphanumeric string, such as:
S8IjvxXE1x6PcwvmClcVfH6r
IMPORTANT: Please make sure to record the API key, as you won't have the opportunity to view it again after navigating away from this page.
Sending a Webhook Request
After obtaining your unique webhook URL and API key, you're all set to send your webhooks. You should POST all webhooks to your designated URL, including the API key within the X-API-Key header:
POST /v1/hooks/816ce4d8-c0cc-476b-8121-33e600e0e33e HTTP/1.1Host: apps-api-feeds.eu.screencloudapps.comX-API-Key: S8IjvxXE1x6PcwvmClcVfH6r
Webhook Data Format
Ensure you send the content of your webhook in the JSON format within the request body to the specified URL. The structure of your data payload is crucial and should adhere to the following schema:
{"items": [{"itemId": "12345","dateCreated": "2024-02-01T12:00:00Z","lastEditedTime": "2024-02-01T12:30:00Z","messageUrl": "https://example.com/message/12345","author": {"displayName": "David Jones","profileImage": {"url": "https://example.com/profiles/davidjones.jpg"}},"content": {"title": {"content": "Sample Title"},"body": {"content": "This is a sample body content for the hook."}},"attachments": [{"contentType": "image","url": "https://example.com/images/sample.jpg"}]}]}
Webhook Params
| Name | Type | Required | Description |
|---|---|---|---|
itemId | string | No | Your own internal identifier. |
dateCreated | string | No | UTC date string item was created. |
lastEditedTime | string | No | UTC date string item was last edited. |
messageUrl | string | No | Will generate a QR code to the message source URL. |
author.displayName | string | No | Display the author name. |
author.profileImage.url | string | No | Display an author profile image. |
content.title.content | string | No | Title of the webhook post. |
content.body.content | string | No | Main body content of the webhook post. |
attachments.contentType | image, link | No | Currently only supports image or link. |
attachments.url | string[] | No | Accompanying image for the webhook post. |
You must supply at least one of the following fields:
content.title.content,content.body.content, orattachments.url. Combinations of these fields are also acceptable.
HTML content in the body of a post.
The content.body.content can also include html in the string. For example <p>This is a paragraph</p>
Accepted HTML tags include:
| HTML Tag | Description |
|---|---|
<p> | paragraph |
<strong> / <b> | bold |
<em> / <i> | italic |
<u> | underline |
<s> | strikethrough |
<blockquote> | quote |
<ol> | numbered list. |
<ul> | bullet list. |
<li> | list item |
<br> | line break |
<p><span class='bg-highlight'>Highlight</span</p> | highlight text |
If the content added in the body includes HTML but has tags not included in the list above, these tags will be omitted and only the content using the tags listed above will appear on screen.
Display Formats
Below are examples showcasing various display formats your webhooks will adopt when they appear on screen. The layout may vary slightly based on the content of your webhook. These illustrations aim to provide an overview of potential layouts.
Show full content screenshot
The example below demonstrates the simplest data structure you would POST to achieve the above result.
{"items": [{"author": {"displayName": "David Jones","profileImage": {"url": "https://example.com/profiles/davidjones.jpg"}},"content": {"title": {"content": "Welcome to our new London Office!"},"body": {"content": "We are excited to announce the opening of our new office in London. The new office is located in the heart of the city and will be the new home for our growing team. We ar elooking forward to welcoming our clients and partners to our new office."}},"attachments": [{"contentType": "image","url": "https://example.com/images/sample.jpg"}]}]}
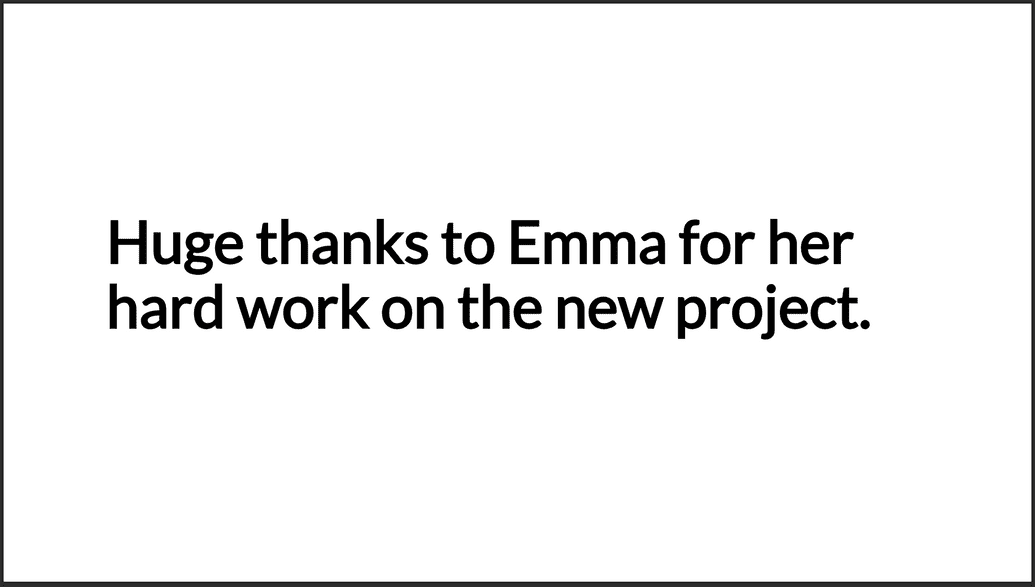
Show title only screenshot
The example below demonstrates the simplest data structure you would POST to achieve the above result.
{"items": [{"content": {"title": {"content": "Huge thanks to Emma for her hard work on the new project."}}}]}
Show body only screenshot
The example below demonstrates the simplest data structure you would POST to achieve the above result.
{"items": [{"content": {"body": {"content": "Happy Anniversary to Richard. 2 years at the company today. Thanks for all your hard work!"}}}]}
Show body (containing HTML) only screenshot
The example below demonstrates the simplest data structure you would POST to achieve the above result.
{"items": [{"content": {"body": {"content": "<p><strong>We are excited to announce the opening of our new office in </strong><strong class=\"bg-highlight\">London</strong><strong>.</strong></p><br/><p>Home to a <span>diverse range of talented team members from:</span></p><ul><li>Marketing</li><li>Customer Success</li><li>Sales and Operations</li></ul><br/><p>We are looking forward to welcoming our clients and partners to our new office.</p>"}}}]}
Show image and body (containing HTML) screenshot
The example below demonstrates the simplest data structure you would POST to achieve the above result.
{"items": [{"content": {"body": {"content": "<p><strong>We are excited to announce the opening of our new office in</strong><strong class=\"bg-highlight\">London</strong><strong>.</strong></p><p>The new office is located in the heart of the city and will be the new home for our growing team.</p><p>Home to a<span>diverse range of talented team members from:</span></p><ul><li>Marketing</li><li>Customer Success</li><li>Sales and Operations</li></ul><p>We are looking forward to welcoming our clients and partners to our new office.</p>",}},"attachments": [{"contentType": "image", "url": "https://example.com/images/sample.jpg"}]}]}
Show image only screenshot
The example below demonstrates the simplest data structure you would POST to achieve the above result.
{"items": [{"attachments": [{"contentType": "image","url": "https://example.com/images/sample.jpg"}]}]}
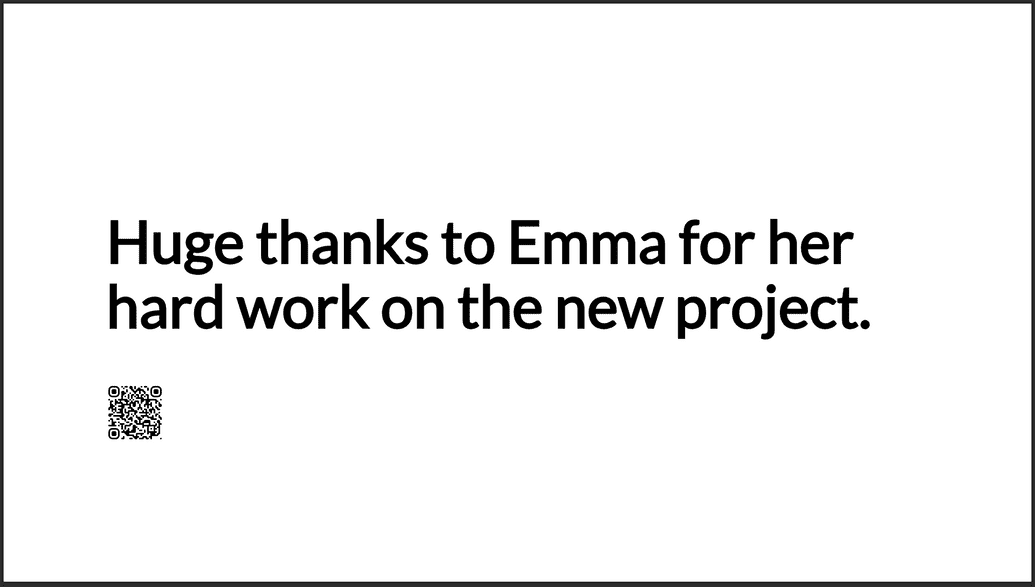
Show title and QR code screenshot
The example below demonstrates the simplest data structure you would POST to achieve the above result.
{"items": [{"messageUrl": "https://example.com/some-page/","content": {"title": {"content": "Huge thanks to Emma for her hard work on the new project."}}}]}
Show title and link screenshot
 A large call to action QR Code represents the link. The user can scan the QR Code and they will be taken to the link.
The example below demonstrates the simplest data structure you would
 POST to achieve the above result.
{"items": [{"content": {"title": {"content": "View the latest Health and Safety Information"}},"attachments": [{"contentType": "link","url": "https://example.com/health-and-safety"}]}]}
Show link only screenshot
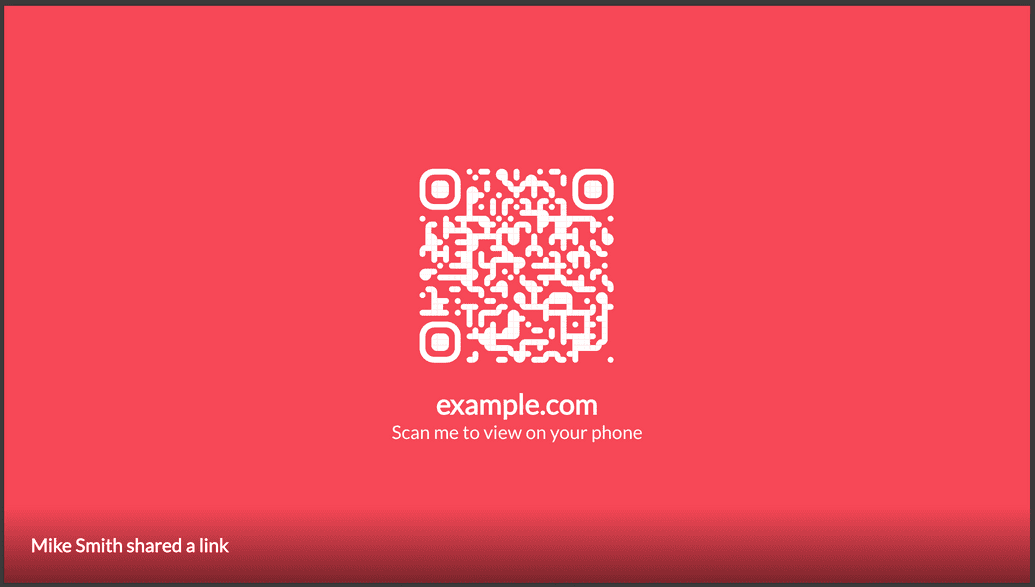 A large call to action QR Code represents the link. The user can scan the QR Code and they will be taken to the link.
The example below demonstrates the simplest data structure you would
 POST to achieve the above result.
{"items": [{"author": {"displayName": "Mike Smith"},"attachments": [{"contentType": "link","url": "https://example.com/health-and-safety"}]}]}
Error Responses
Every error response you get from a webhook POST will be in the format outlined below. Essentially, you'll be given a list of all errors detected in your POST request. Receiving any error means the request has failed, and your webhook wasn't processed. Address the errors and attempt the request once more.
{"messages": ["At least one of title, body, or attachment is required"]}
Invalid HTML content
When including HTML content in the body of a post, we'll verify the validity of the HTML. Should this verification fail, you'll be alerted that the HTML is invalid and the post will not be processed.
Here's how such a response would appear:
{"success": false,"data": {"warning": {"message": "We were unable to post the following items due to the issues listed below. Please review the text and try again","data": [{"itemId": "item-0003","message": "Invalid text content in body",},]}}}
If there are several posts being sent and includes one post with invalid HTML, the other posts will be processed successfully but the post with invalid HTML will not be processed.
Here's how such a response would appear:
{"success": true,"data": {"warning": {"message": "We were unable to post the following items due to the issues listed below. Please review the text and try again","data": [{"itemId": "item-0003","message": "Invalid text content in body",},]}}}
Problematic Attachments
When you include attachments with a specified contentType of image, we'll verify not just the URL's validity and existence, but also confirm that the content type matches an image. Should this verification fail, you'll be alerted that the attachment has been excluded from the post. The webhook post will proceed successfully; however, the invalid images will be omitted.
Here's how such a response would appear:
{"success": true,"data": {"warning": {"message": "We were unable to access the following image attachment urls. These images have been removed from your post item. Please check the urls and try again","data": [{"itemId": "item-0001","url": "https://example.com/invalid-image.png"}]}}}
Code Example
The example below demonstrates how to send a webhook using cURL. Just swap out the placeholders (like the URL and API key) with your own information gathered from the initial setup step to trigger the webhook.
curl --location 'https://apps-api-feeds.eu.screencloudapps.com/v1/hooks/816ce4d8-c0cc-476b-8121-33e600e0e33e' \--header 'X-API-Key: S8IjvxXE1x6PcwvmClcVfH6r' \--header 'Content-Type: application/json' \--data '{"items":[{"itemId":"12345","dateCreated":"2024-02-01T12:00:00Z","lastEditedTime":"2024-02-01T12:30:00Z","messageUrl":"https://example.com/message/12345","author":{"displayName":"David Jones","profileImage":{"url":"https://example.com/profiles/davidjones.jpg"}},"content":{"title":{"content":"Sample Title"},"body":{"content":"This is a sample body content for the hook."}},"attachments":[{"contentType":"image","url":"https://example.com/images/sample.jpg"}]}]}'
